¶ Messaging
¶ Send messages to your subscribers.
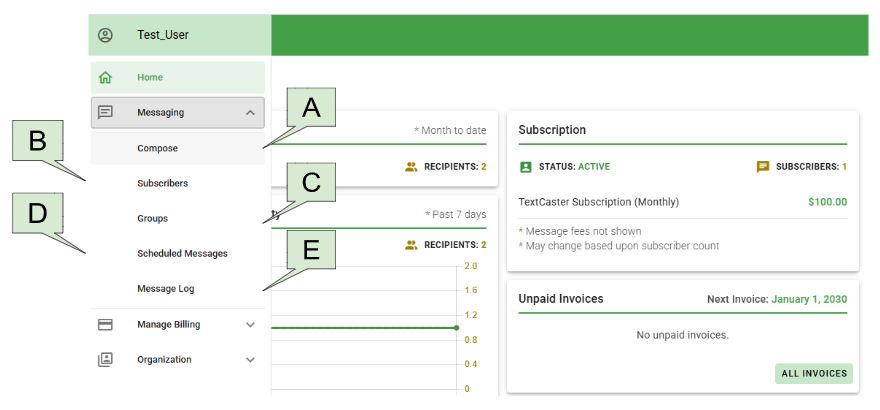
¶ A. Compose
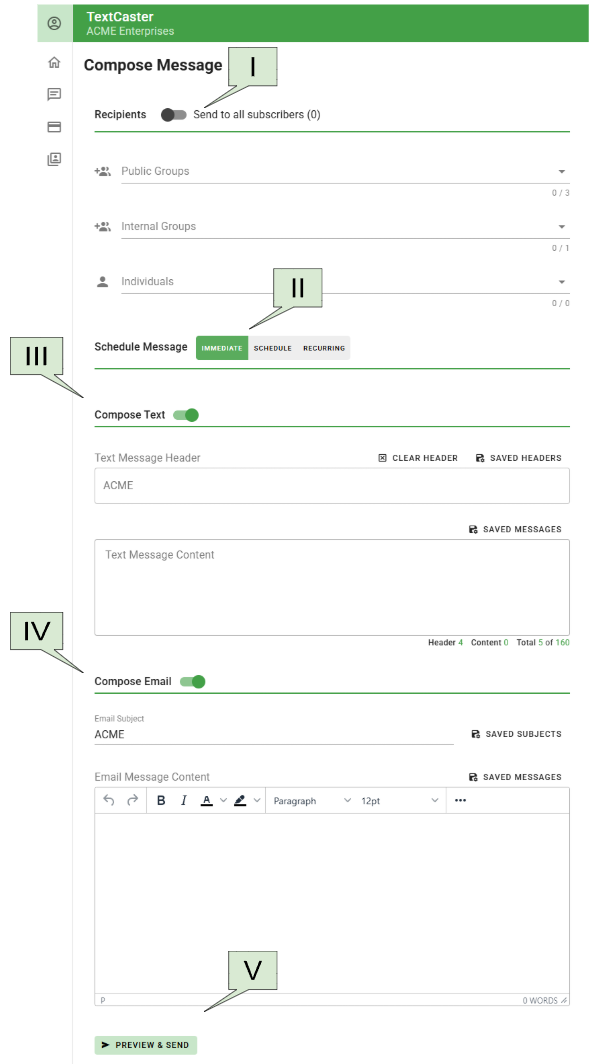
¶ I. Recipients
- Send to All Subscribers
- This option allows you to send messages to every subscriber, regardless of the groups they belong to. Incorrect use of this feature may result in unnecessary message fees and a rise in subscriber opt-outs, as some subscribers may receive irrelevant messages.
Important: Messages can be precisely targeted to the intended audience by using groups and individuals
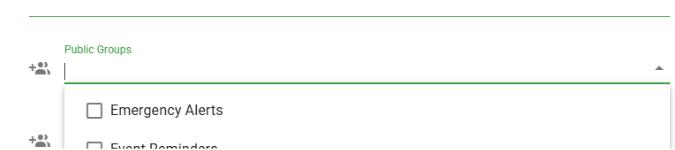
- Public Groups
- These are the message groups listed on your Sign-up Page. To select a Public Group, click the down arrow on the right of the field and select the desired group(s). Begin typing to filter by name.
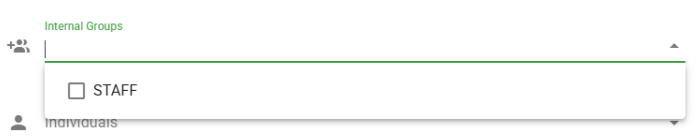
- Internal Groups
- These groups are not visible on your Sign-up Page. To send a text message to one or more Message Groups, click the "down" arrow to the right of the field and select the desired group(s). Begin typing to filter by name.
- Individuals
- Select individual subscribers to send messages to. Begin typing to filter by name, email, or phone number

¶ II. Schedule Message
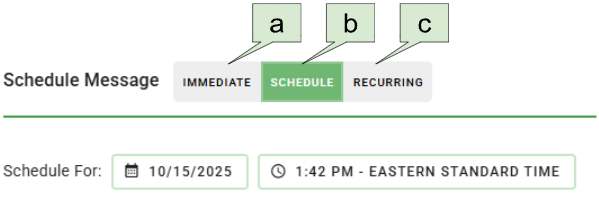
- a. The default setting for a message is to send it immediately.
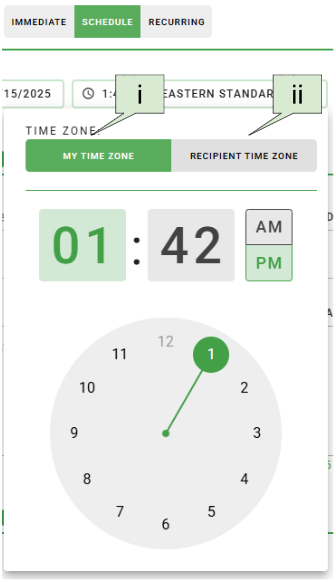
- b. To schedule a message for later delivery, click on the “schedule” toggle. When scheduling a message, you have two options for setting time:
- i. Your Time Zone
- The message will be sent at the selected time based on your time zone, regardless of the recipient's local time zone
- ii. Recipient's Local Time Zone
- The message will be sent at the selected time based on each individual recipient's local time zone.
- i. Your Time Zone
- c. Recurring
- To schedule a message for recurring delivery, click on the “Recurring” toggle. When scheduling a recurring message, you have four options the recurring schedule:
- Daily
- Every number of days -or-
- On Weekdays only
- Weekly
- Every number of weeks and the day of that week.
- I.e. Send every two weeks on Wednesday.
- Every number of weeks and the day of that week.
- Monthly
- On a given day number of every month -or-
- On a given number (1st, 2nd, etc.) of day (Mon, Tues, Wed, etc.) of every month.
- Yearly
- On a month and date of every year.
- i.e. April 1st of every year
- On a month and date of every year.
- Daily
- Two options for setting the time:
- i. Your Time Zone
- The message will be sent at the selected time based on your time zone, regardless of the recipient's local time zone
- ii. Recipient's Local Time Zone
- The message will be sent at the selected time based on each individual recipient's local time zone.
- i. Your Time Zone
- To schedule a message for recurring delivery, click on the “Recurring” toggle. When scheduling a recurring message, you have four options the recurring schedule:
- Important Note on Time Zones
- Recipient time zones are determined by their selection during the sign-up process, not by the physical location of their mobile device.
- Consideration for Recipients
- Always be mindful of "Quiet Hours" (before 8 AM and after 9 PM local time) when scheduling messages to avoid disturbing recipients.
¶ III. Compose Text
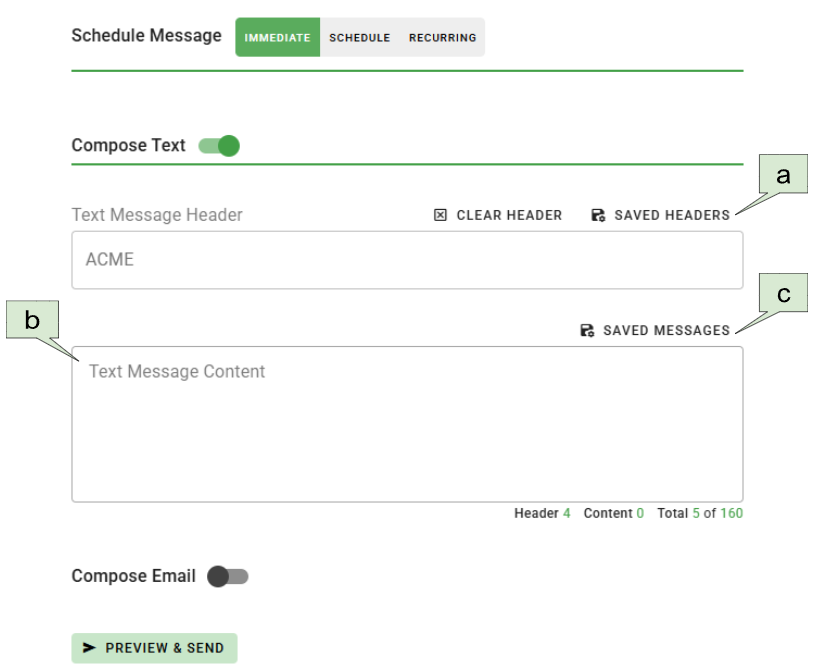
- a. Headers
- To add a subject to your text message, use the Header field. This field may be pre-populated and non-editable if a required header has already been entered, in which case it will appear grayed out.
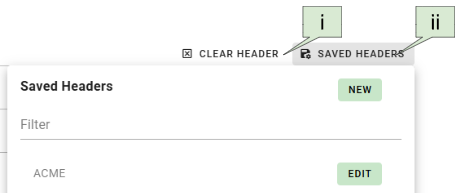
- i. Clear Header
- Clears the header field instantly.
- ii. Saved Headers
- Choose from a list of previously saved headers.
- New
- Select this option to create a new header for use in messaging by yourself and other users.
- Edit
- Edit a saved Header.
- Filter
- Allows you to access your preferred header quickly and easily.
- New
- Choose from a list of previously saved headers.
- i. Clear Header
- To add a subject to your text message, use the Header field. This field may be pre-populated and non-editable if a required header has already been entered, in which case it will appear grayed out.
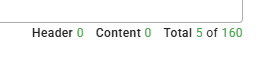
- b. Text Message Content
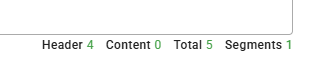
- When composing a text message, you are limited to 160 characters, including those in the message header. The character counter at the bottom of the text message box displays the total number of characters used.
- For accounts with longer message support enabled, an additional counter appears counting the total number of segments. For more information, click here for Longer message support.
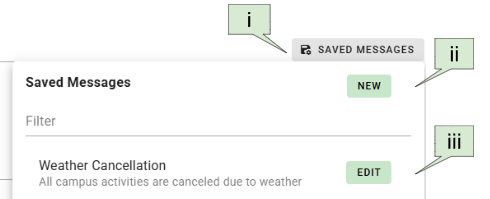
- c. Saved Text Messages
- Allows you to select a pre-saved Text message.
- i. New
- Select this option to create a new saved text message for use in text messages by you and other users.
- ii. Filter
- Allows you to access your preferred text message quickly and easily.
- iii. Edit
- Edit a saved text message.
- i. New
- Allows you to select a pre-saved Text message.
¶ IV. Compose Email (if available)
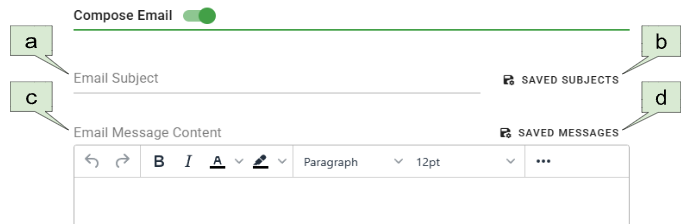
- a. Subject
- When sending email messages, a subject line is required. You can create a custom subject line for your message.
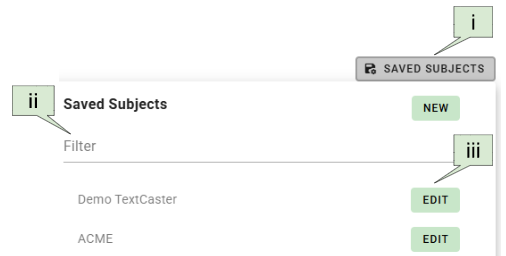
- b. Saved Subject
- Choose from a list of pre-saved subject lines.
- i. Add - Create a new subject line for future use by yourself and other users
- ii. Filter - Quickly search and filter your saved subject lines.
- iii. Edit - Edit a saved email subject line.
- Choose from a list of pre-saved subject lines.
- c. Email Message Content
- Use the What You See Is What You Get (WYSIWYG) tool to compose rich media emails. This tool creates HTML in the background, offering a word processor-like interface.

- d. Saved Messages
- Allows you to select a pre-saved email Message
- i. New
- Select to create a pre-saved email Message
- ii. Filter
- Allows you to search and filter your preferred email Message quickly and easily.
- iii. Edit
- Edit a saved email message.
- i. New
- Allows you to select a pre-saved email Message
¶ V. Preview and send
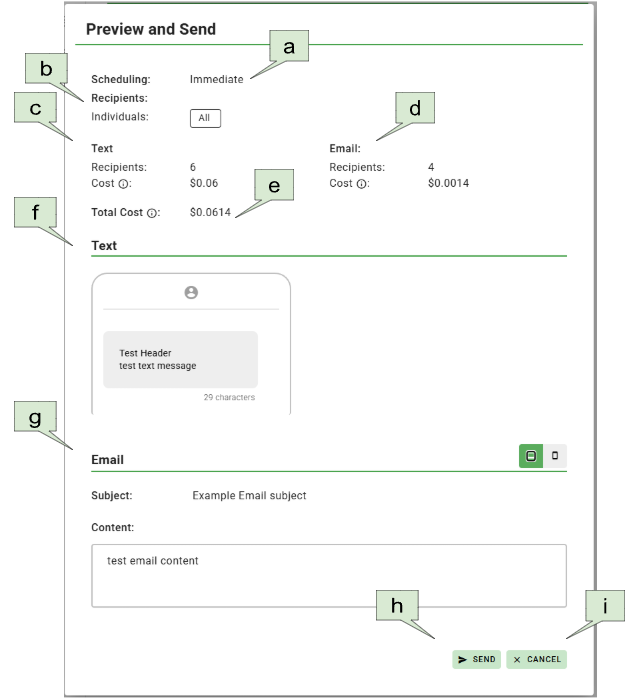
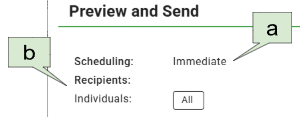
- a. Scheduling
- An overview of when the message will be sent
- b. Recipients
- Groups and individuals that will receive the message
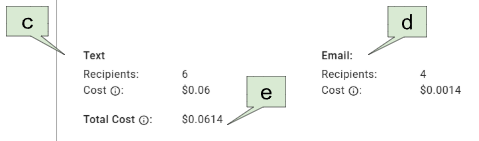
- c. Text
- Number of Recipients
- The number of recipients to receive this message. Note: If recipients are in more than one group listed, the number displayed will count them in each group. However the system will still only send one message to that recipient.
- Cost
- An estimate of the message fees for sending this message. If recipients are in more than one group listed, the message fees displayed will add the total. This is only an estimate; once deduplication occurs, you will only be charged for the actual number of unique recipients.
- Number of Recipients
- d. Email
- Number of Recipients
- The number of recipients to receive this message. Note: If recipients are in more than one group listed, the number displayed will count them in each group. However the system will still only send one message to that recipient.
- Cost
- An estimate of the message fees for sending this message. Note: If recipients are in more than one group listed, the message fees displayed will add the total. This is only an estimate, once the deduplication occurs, you will only be charged for the actual number of messages sent.
- Number of Recipients
- e. Total Cost
- The sum of message fees from both Text Messages and Email (If applicable)
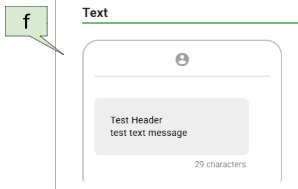
- f. Text Preview
- A preview of the Text message as seen on a mobile device.
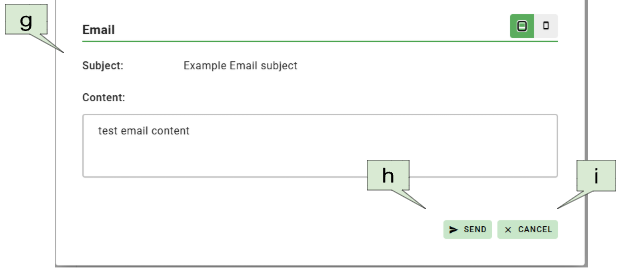
- g. Email Preview
- A preview of the email message.
- Desktop
- Email viewed as an approximation of the message seen from a computer screen.
- Mobile
- An approximation of the message as seen from a mobile device.
- Desktop
- A preview of the email message.
- h. Send/Schedule
- Commit to sending the message composition.
- i. Cancel
- Return to the compose screen.
¶ B. Subscribers
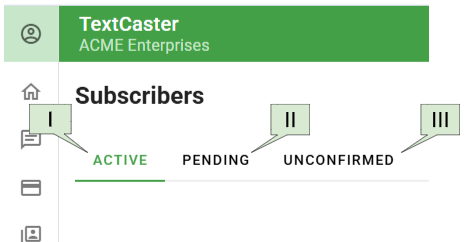
¶ I. Active
- Active subscribers are currently subscribed to receive messages from your organization.
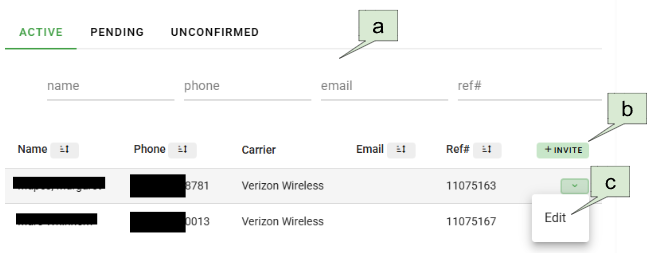
- a. Filter view
- Filter by: Name, Phone, or Email.
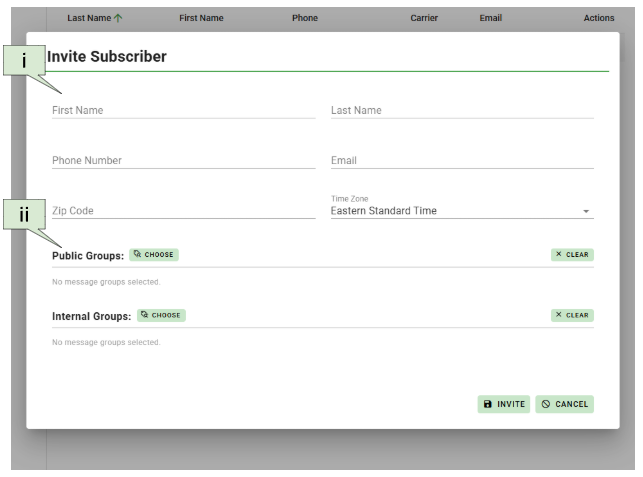
- b. Invite Subscriber
- To invite individual contacts, click on the Invite button. In the Invite Contact screen you can enter the following information:
- i. Name of Subscriber, Mobile Number, Time Zone of Contact, Email Address, and Zip Code (Optional)
- ii. Select the groups desired for the subscriber and click the Invite button.
- To invite individual contacts, click on the Invite button. In the Invite Contact screen you can enter the following information:
- c. Edit Contact
- You may edit the subscriber’s contact information and Public and Internal Groups.
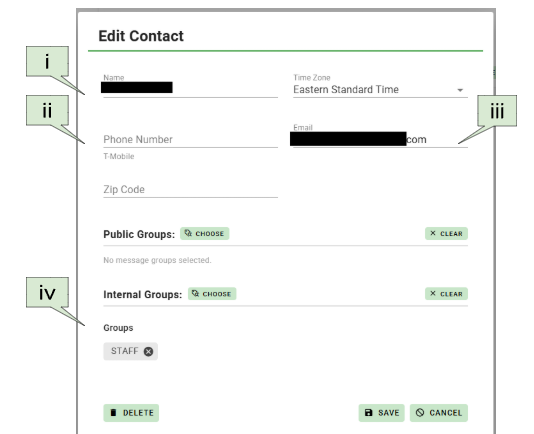
- i. Name of Contact, Mobile Number, Time Zone of subscriber, Email Address, and Zip Code (Optional)
- ii. Phone Number
- Changing phone number will generate a confirmation message being sent to the subscriber at the phone number it was changed to. The change will not take effect until the subscriber confirms the new number.
- iii. Email Address
- Changing the email address will generate a confirmation message being sent to the subscriber at the email address it was changed to. The change will not take effect until the subscriber confirms the new email address.
- iv. Groups
- Add or remove groups for this subscriber.
¶ II. Pending

- a. Type
- Signup
- Invites created by subscribers using the Sign-up Page.
- Invite
- Invites generated by a User within the dashboard.
- Reconfirmation
- Invites initiated due to a change in a subscriber's contact information (phone number or email address).
- Signup
- b. Phone Status
- Scheduled
- The confirmation text is pending delivery.
- Sent
- The confirmation text has been dispatched.
- Confirmed
- The confirmation text was sent and acknowledged by the subscriber.
- Scheduled
- c. Email Status
- Scheduled
- The confirmation email is pending delivery.
- Sent
- The confirmation email has been dispatched.
- Confirmed
- The confirmation email was sent and acknowledged by the subscriber.
- Scheduled
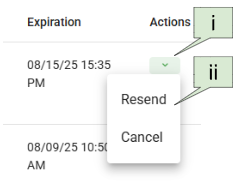
- d. Actions
- i. Resend
- Send a confirmation message again.
- ii. Cancel
- Stop a pending confirmation.
- i. Resend
¶ III. Unconfirmed
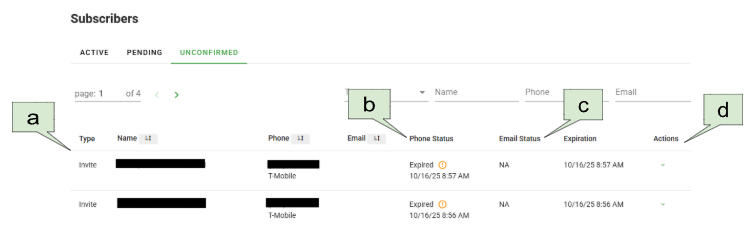
- a. Type
- Signup
- Invites created by subscribers using the Sign-up application.
- Invite
- Invites generated by a User within the dashboard.
- Reconfirmation
- Invites initiated due to a change in a subscriber's contact information (phone number or email address).
- Signup
- b. Phone Status
- Failed
- TextCaster was unable to send the confirmation text.
- Canceled
- A User canceled the confirmation text.
- Expired
- The invitation expired without subscriber confirmation.
- The Orange information icon provides instructions unique to each subscriber to confirm the invite.
- Failed
- c. Email Status
- Failed
- TextCaster was unable to send the confirmation email.
- Canceled
- A User canceled the confirmation email.
- Failed
- d. Actions
- Resend
- Send a confirmation message again.
- Cancel
- Cancel the invite. The subscriber will not be able to confirm the invite.
- Resend
¶ C. Groups
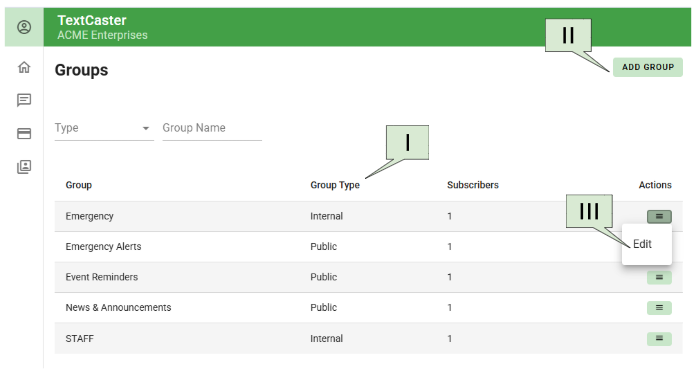
¶ I. Group Type
- Public
- These are the message groups listed on your Sign-up Page.
- Internal
- These groups are not visible on your Sign-up Page.
¶ II. Add Groups
- Allows you to add a group
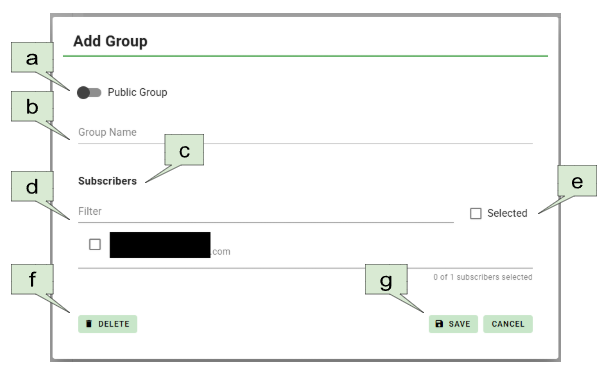
- a. Public Group switch
- Toggle this to make the group available for subscription in the Sign-up Page.
- b. Group Name
- Assign a name to your group.
- c. Subscribers
- Add subscribers to this specific group.
- d. Filter
- Search for subscribers by typing their name or phone number.
- e. Selected check box
- Check this box to display only the subscribers already assigned to this group.
- f. Delete
- Remove the group without deleting its subscribers.
- g. Save
- Confirm and store your group and its settings.
¶ III. Edit Groups
- Allows you to edit or delete that Group
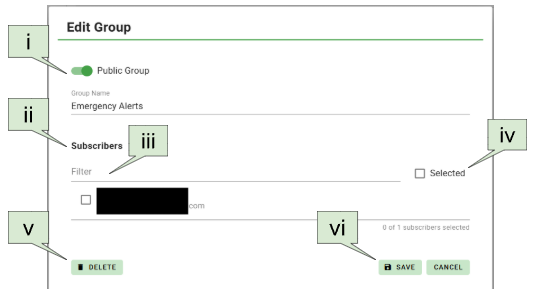
- i. Public Group Toggle
- Change a group's visibility between Public (visible on the sign-up application) and Internal.
- ii. Subscribers
- View current subscribers and add new ones.
- iii. Filter
- Search for specific subscribers within the group.
- iv. Selected Checkbox
- Display only subscribers already part of the group.
- v. Delete
- Remove the entire group.
- vi. Save
- Apply and store all group settings.
NOTE: Internal Groups DO NOT appear on the public Sign up Page. Internal Groups are groups you wish to limit who can subscribe to the group. Some examples for business are department managers, reporters, IT staff and sales associates. Subscribers in the Internal Groups must be manually added as subscribers are not offered the ability to subscribe to Internal Groups from the Signup Page.
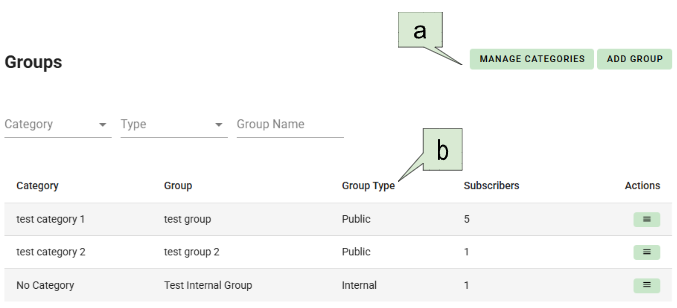
¶ IV. Categories (Optional)
- If you have a large number of message groups, you can enable categories to easily organize them. Think of a category as a custom label or section that lets you group related message groups together, making your entire list simpler to navigate and manage.
- If your TextCaster system does not currently include Category Groups and you would like to add the feature, you will need to contact TextCaster Support at 833-399-8100 or “Support@textcaster.com”.
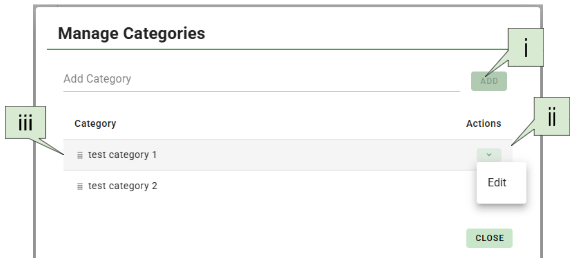
- a. Category (Manage)
- i. Add
- Name your new category and click “Add”
- ii. Edit
- Allows you to edit the name of a specific category
- iii. Order
- Drag and drop the categories to display in the order you want them to appear on the Sign-up Page.
- i. Add
- b. Groups (When using Categories)

- i. Edit
- When Categories are enabled, an extra field appears on the group edit form. This field allows you to assign Message Groups to a specific Category.
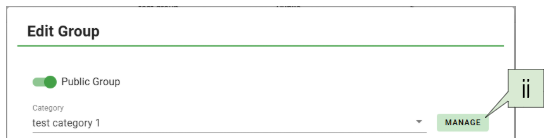
- ii. Manage
- Allows you to Add, Edit, and Order your categories.
¶ D. Scheduled Messages
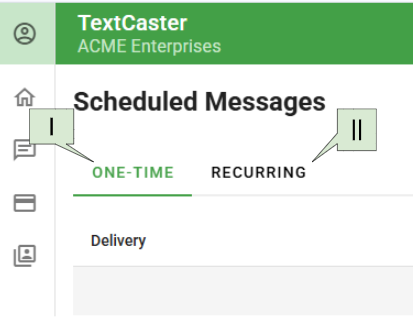
¶ I. One-Time Scheduled Messages
- Messages scheduled to be sent once at a time in the future.

- a. Delivery
- When the message is scheduled to be delivered
- b. Message
- A preview of the contents of the scheduled message
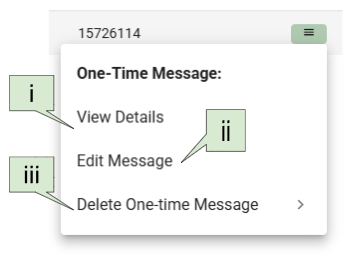
- c. Actions - One-Time Message
- i. View
- View the full details of the message.
- ii. Edit Message
- Edit the content of the message before it is sent out.
- iii. Cancel Message
- Cancel the message from being sent
- i. View
¶ II. Recurring Scheduled Messages
- Messages scheduled to be sent repeatedly in the future.

- a. Schedule
- The recurring cycle of the schedule
- b. Next Delivery
- The next date the message will be sent in the recurring cycle of the schedule.
- c. Message
- A preview of the contents of the scheduled message
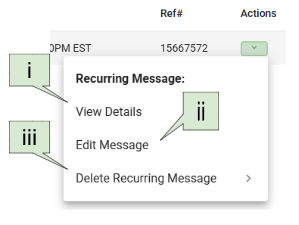
- d. Actions - Recurring Message
- i. View Details
- View the full details of the message.
- ii. Edit Message
- Edit the content of the message before it is sent out. The schedule of the message can be changed as well.
- iii. Cancel Message
- Cancel the message from being sent
- i. View Details
¶ E. Message Log
View the message log of all messages sent by each System Administrator and Message Manager, including delivery time, date and recipient(s).
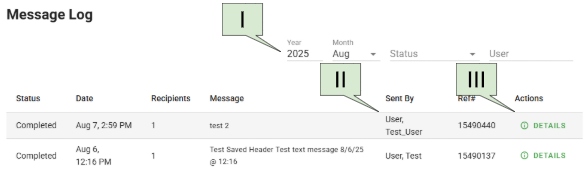
¶ I. Filter View
- Sort view by
- Year
- Month
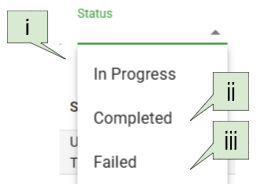
- Status
- i. In-progress - Messages ready to be sent.
- ii. Completed - Messages sent by TextCaster
- iii. Failed - Messages failed to be sent.
- User
- The name of the User who authored and sent the message
¶ II. Sent by
- Lists the name of the User who sent the message
¶ III. Details
- Provides details on the message sent
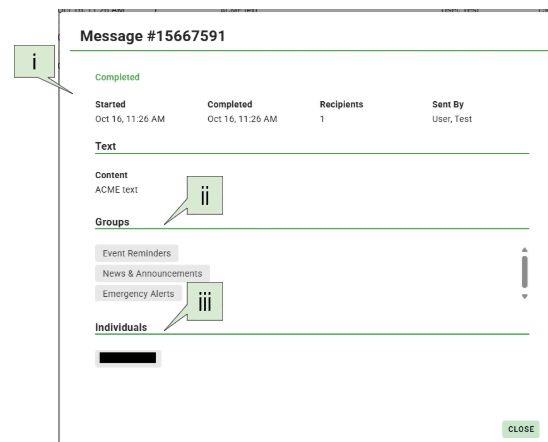
- i. Details
- Start and Completed time of the job to send the message
- Number of total Recipients
- User the message was sent by
- ii. Groups
- Groups the message was sent to
- iii. Individuals
- Individuals outside of the groups that the message was sent to.